Am I just a regular crafting genius these days or what!?! Well, okay maybe that’s going a bit too far, but I sure have been making lots of stuff!
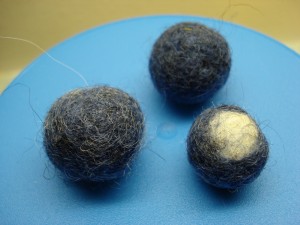
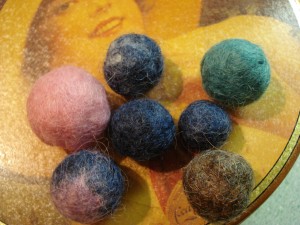
This is another *first* for me – my first attempt at wet-felted beads. Another process a little more tricky than it looks. I had about as many beads work as not, but I am pleased with the ones I ended up with!
I am planning to do on-line video tutorials on how to do this (as well as lampworking) in future, but until then, pictures of the finished product will have to suffice, along with these straight-forward instructions.
The first thing you’ll need to do is get some roving, which is raw wool used to make yarn. Roving comes in all different colors, and sometimes is carded or combed. Try looking at a yarn or fabric store for roving, a local farm that raises sheep or goats, knitting shops or check an internet site that sells wool. Roll a small bit of one color of roving into a ball, smaller than the bead size you want. Next, tightly wrap a different color around the ball. You may repeat as often as you like, with as many colors as you like. When you’re finished your ball will be twice the size that you would like the finished bead to be.
Now comes the fun part. Get yourself a pitcher of hot soapy water and about four tablespoons of dishwashing liquid in six cups of water will work well. Make sure the soap is dye free. Now get your bead wet. Make sure it’s completely saturated in the soapy water. Then begin to roll the bead between your hands, gently! If you put too much pressure on it, it’ll put folds and creases in the bead that won’t come out once it’s dry. You want your bead to be smooth. The wool is going to be kind of messy when you first start, but be patient, it will harden as you work.
You can take this time to add designs, if you wish. You can work bits of wool into it to make a stripe or a polka dot, even a face. Or if you like the way your beads look without embellishment, that’s also fine.
Next, you’ll be shaping the bead. Dip it in hot water again to keep the temperature up, and roll it between your hands again, putting a bit more pressure on it but being careful not to make any folds in it. Be creative – you can make round beads, oval beads, or long skinny beads. Once it’s the size you’d like (half an inch is a good size), rinse your bead in cool water, getting all of the suds out of it. I’ve heard some people then dip them in a mixture of mild vinegar water, but I haven’t done this. I’m not exactly sure what it’s for. Then. let the bead dry overnight. Make as many beads as you think you’ll need for your project. You might want to poke a hole in each bead with a darning needle before it gets too hard, so you have an easier time stringing the beads later.
Now you finally get to see how your beads look as a finished project. Take a sharp needle and some crochet thread, and string your beads. Your projects are limited only by your imagination. Make a necklace, bracelet, or even small earrings with your beads. Mix them with wooden beads, glass beads or other types! You can be as creative as you like! Goodluck!


